 |
 |
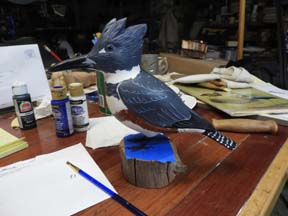 |
At the Annual Meeting we began the discussion of the subject for our August 2026 3 Day Carving Class. With the success of the past 2 classes we again be offering our August Carving Seminar with Birds of Vermont Museum for the class we decided to go with a Belted Kingfisher. Due to its size, it will be a slightly smaller scale and will included setting feet and mounting on a base or branch. Due to its size, the class is suitable for both novice and more experienced carvers, as the carving can be done as a more basic "smoothie" or more detailed at the carvers choice. However due to its size, carvers should have a good size carving knife in addition to smaller palm tools. Members were able to see the progress on the prototype at the January and February CarveIns. During the class participants will be able to finish carving, setting the eyes and legs, and beginning to paint. We will finish painting at the Annual Meeting as needed.
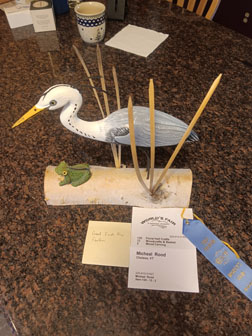 |
Our August 2024 Class, this year was a scale Great Blue Heron with Matthew
Strong, covering carving and Bob Lindemann texturing and painting. The 3
day class was once again held at the Birds of Vermont Museum. The Museum
has recently installed a heat pump to help with the August heat, but the
first day of the it class stayed in the high 60's, unusual for August. There
was a choice of two sizes with many in the group deciding to do one in the
class and the other later. Due to the long bent neck, the blanks were in
2 pieces, so Matt decided to start with the body. Due to the amount of wood
needing to be removed, we had a good pile of chips on the floor as we started
on the back and lower part of the neck then transitioned to the bottom.
By lunch time the blanks were starting to look like headless herons. The
afternoon was devoted to finishing blocking in the blank and then laying
out the wing location and carving the wings, tail and underside.
Day two was devoted to carving the head. We started with a centerline around
the blank and then laying out the major features. Due to the large bend
in the neck and possibility of splitting in half, we proceeded slowly to
begin rounding the head and establishing the beak, and then rounding the
neck staying away from where the neck is doweled to the body. Matt showed
the group how to carve the beak in a variety of steps, with the heads taking
shape by lunchtime. In the afternoon the head was final shaped and sanded,
and then they eyes holes were drilled and eyes set. To finish the day, the
head and body were glued together and set aside to dry for the night.
Friday the final day the main parts of the heron now only needed the large
lump of wood between the two pieces finish rounded to complete the neck.
Matt demonstrated how you have to carve each side of the joint in different
directions so as not to split the wood. After some final sanding, the main
feather groups were laid out and carved, then Bob show the group how to
some texturing of the neck using power carving with a diamond bit and stone
texturing. After lunch it was time to paint. With the bright sun after each
step the heron could be put on the front porch to dry quickly in the sun,
and ready for the next color layer of paint. By the end of the class friday,
just about all the herons were finish carved and painted with a few just
needing a few final detains painted which were done during the Show on Saturday.
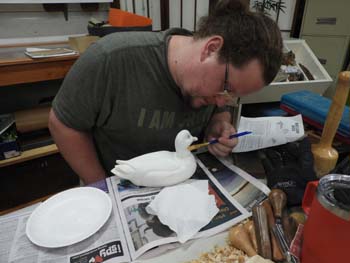 |
Our 2024 August Class, was a ¾ scale Mallard Drake with Matthew Strong, held at the Birds of Vermont Museum. While the Museum usually opens at 10:00, Erin was able to open the doors early, so we could begin carving at 9. This year, right up to the night before, people were contacting us that wanted to take the Class, which we maxed out at 9 carvers. Wednesday we Matt handed out the blanks, and work began on the head. Layout lines showed the locations of the beak, width of the top of the head and eye channel, and then the chips began to fall, and by Noon the basic parts of the head were began taking shape. The afternoon was spent refining the head shape, blending in all the parts, and adding details to the beak. Thursday morning, Matt had a Dentist appointment so I covered starting on the Body blank. Even at ¾ scale, the block required a lot of wood to be removed, some continued with just knife carving while others opted to clamp the block down and use larger tools. By mid day we showed two variations on the primary back feathers, and prepped the body to have the head glued on. Thursday ended with quite a pile of chips on the floor, and sore arms, with everyone working at their own pace. Friday, eyes were set, heads glued on and then the task of carving the neck to body transition. No easy task, as the grain didn't want to cooperate. Later in the afternoon, while some were still proceeding to get all the parts carved, others were ready for Gesso to seal the carving ready for painting. At the end of the day, we went over laying out the basic beginning of the painting process, which we will continue throughout the monthly CarveIns and at the Annual Meeting in October.
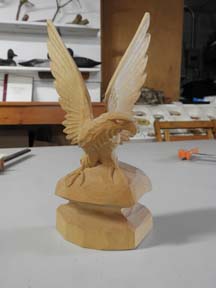 |
We have decided to put off our Seahorse carving Seminar we had planned for this August till a later date. In its place, after our Bellamy Eagle Class 2 years ago, Matt showed us a small carving of an eagle with open wings , which we thought would make an excellent project. The 3 day class will once again be held at the Birds of Vermont Museum from 9 to 4 each day. We have decided to keep the cost much the same as in the past. The cost of the 3 day class will be $120. Eagles are always a popular subject to carve, and this is a good opportunity to carve one with Matthew leading the class. We will provide coffee and light snacks each day, bring your own lunch. If you are interested in taking the class, let Barb Taylor know. Questions? Call or email Bob Lindemann.
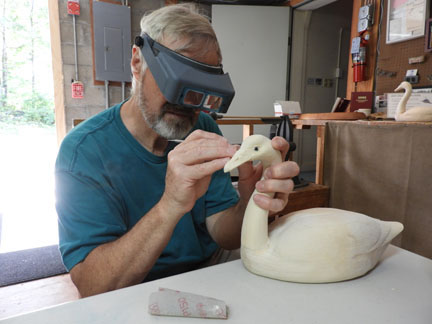 |
Our August Class this year was a 1/3 scale Trumpeter Swan, held at the Birds of Vermont Museum. While the Museum usually opens at 10:00, Erin arrived a bit early each day so we could carve from 9 to 4. As this year's project could be carved in various styles, we began with an introduction to wildfowl carving styles and then the 5 carvers attending were ready to get started on the blanks. Due to the long curved neck, we began with the head and neck. We started rounding the head and neck. The long curved neck had a large amount of material to remove trying to keep a round tapered shape. The beak was probably the most difficult part to carve as it is in two sections and tapered, most in the class choose to do a more detailed accurate carving of the beak, which was a bit more involved. Lots of reference drawings and photos came in handy before the end of day 1. One of the highlights of carving at the Museum are the visitors that stop by to see what we were carving and ask lots of questions. Thursday morning we continued working on the heads and then pulled out the body blanks. While the body is not as complicated as the head, due to its large size there was a lot of wood to remove, especially as most choose to do a more detailed/realistic version of the body shape. The pile of chips we generated were very welcome to the museum as the recently built a "moldering privy "along one of their trails. The blank was screwed to a baseboard then clamped to the table, and larger tools came in handy to get the blank carved. By day's end the two parts were starting to look like a bit overweight Swan. Friday, we fitted the head to the body, and attached it temporarily to help transition the parts together. After lunch, we worked between both parts, seeing where more wood needed to be removed. We had hoped to epoxy the neck to the body, but decided instead to set the eyes, and just screw the head on so it could be removed for more carving and fitting of the two parts. By the end of the friday, the Swans all looked very good, just needing some more work, fine finish carving and sanding before painting. Matt managed to finish sanding one Swan and got a quick coat of paint on. The remainder of the Swans will be ready for final painting at our Annual Meeting in October. Once again, using the Museum for our 3 day class proved an excellent choice for our 3 day carving seminar.
|
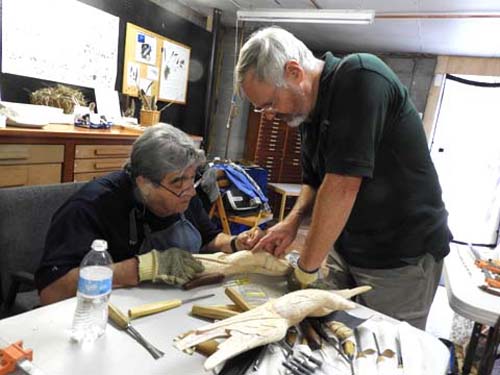 |
Our August 2021 Class was a Bellamy Eagle, this year we choose the Birds of Vermont Museum as the location for our 3 day class. We had a bit of a late start, but were soon the 5 carvers attending were ready to get started on the blanks Matt had prepared for us. As the carving was in two parts, we focused the first day on the head as once it is glued to the body many parts are very difficult to work on. We then narrowed the head and beak and then began laying out the mouth and tongue. One of the highlights of carving at the Museum are the visitors that stop by to see what we are working on, and may someday become interested in carving. In the afternoon we were ready to detail the eye and rounding the rest of the head, finishing it by the end of the day. Thursday tropical storm "Fred" made for a good day to stay inside and carve. We first started on the wing under where the head would go, again after the head is glued on this area is difficult to work on. We then started carving the right side of the wing, which was finished by lunchtime. The afternoon was spent lying out the feather quills and carving the splits. Right on time, we glued the head to the body and clamped it before we left Thursday. Friday started with a large job of transitioning the neck into the body which required removing a large pile of chips to work the two parts together for a smooth transition. The feathers on the neck could then be carved and detailed. The afternoon was spent fine tuning all of the parts of the carving, and removing parts on the back of the carving to show the depth of the wings. Matt finished with a quick explanation of the options for finishing the piece. We cleaned up the Shop area and headed out to get ready for the Show the next day. Using the Museum for our 3 day class proved an excellent choice.
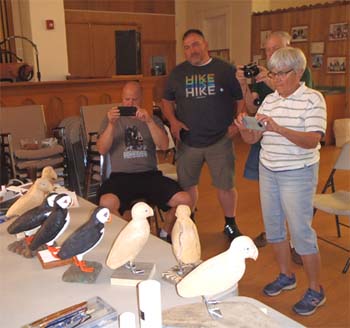 |
Our August Class this year was a full scale Puffin. Dave Tuttle used
the basic pattern from the "Carving a Pudgy Puffin" book by Erwin
Flewelling as the focus for the class. As the seven members arrived at the
Senior Center in Morrisville, the picked up their blanks and soon had quite
a pile of wood chips on the floor, rounding off the blanks by lunchtime
the first day. After lunch, Dave demonstrated how to begin shaping the head
and beak, as well as preparing the glass eyes for the head. With the pile
of chips and small glass eyes, one eye disappeared in the pile of chips,
so we went about a "looking for a lost contact lens" drill as
we cleaned up at the end of our first day.
Day two started with working on the details of the head, beak and feather
groups. As Mark was looking over Dave's example carving, the lost eye was
found somehow attached to Dave's base. With only 3 days to carve, Dave provided
cast feet for the Puffin. The upper legs were then carved and drilled to
fit the cast feet. Those wanting a flat base began carving the base. After
lunch, everything was beginning to take shape, so Dave demonstrated how
to mix the epoxy putty and set the eyes. By the end of day 2, the legs and
base were all fit together, but we held off gluing the legs till after painting.
Due to an unexpected event, Dave had to head back home Friday, so left all
the paints, and directions for finishing, painting and assembling the bases
for our "substitute instructor". Several members of the class
had decided rather than painting, to spend the last day detail carving the
basic feather groups, and then power carving and burning feathers prior
to painting. The other half of the class finished basic details, epoxied
in the legs and then began the process of painting the Puffin. By mid afternoon,
the Puffins were all painted and assembled. Once again a very good class
with participants starting with a blank and having in a finished carving
in 3 days.
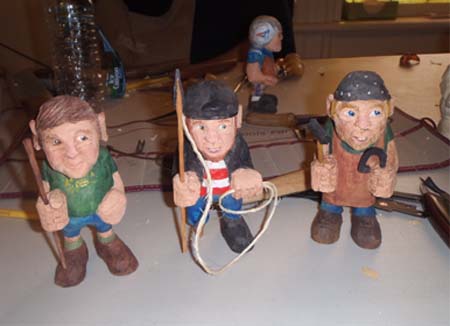 |
Our 2018 August Class subject was "Blockheads". Dave Tuttle
used a modified basic pattern from the "Blockheads" book by Steve
Prescott as the focus for our class. All Blockheads are carved from the
same basic pattern, and modified based on the subject you wish to carve.
For a start, we all focused on carving a "Hiker Blockhead" using
a sample Dave had carved. While our numbers were down a bit due to conflicts,
Mark Farkas part of the "Wednesday night group" joined us, and
quickly fit right in. After demonstrating how to block in the basic parts
like the ears, head, and hands, everyone was given a study stick to carve,
learning the steps in developing a face, before tackling the actual carving.
Once completed, it was on to carve the face, and begin the details of the
arms, hands, legs and shoes. Thursday morning we put the finishing touches
on the Hiker, and the original plan was to start on the "Sea Captain",
but we were given the option to select another subject if we wanted to.
Some worked on the Sea Captain while others choose hockey players, fishermen
and mountain men. Thursday proved to be a day for multiple cuts, not only
on our carvings… Thursday night additional pieces like hockey sticks,
fish and knives were cut out to add to the carvings friday morning. Our
last day, Friday, Blockhead #3 was begun, and then the option of completing
our third subject, or begin painting. The group split between the 2 options,
and it was a very busy day right to quitting time, some with 3 completely
carved, and others with 2 painted, and another in the works. Once again
Thank you Dave for an excellent class, and sharing your expertise with us.
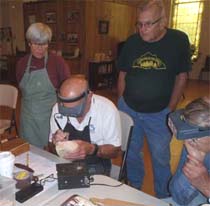 |
This year, once again at the Morrisville, VT Senior Center, nine members signed up to carve a scale loon carving with Larry Bertrand. After a few setbacks, Larry found a good source of basswood, and Matt cut out the blanks for the class. After the introduction and numerous patterns and reference material for us to look over, the first challenge was to screw the head onto the body blank, and determine which direction we wanted the loon for face. After rounding the body we began to layout the major feather groups and soon it was lunch time. The afternoon was spent blending and rounding the head and finished with gluing in the eyes. Larry showed us his first bird carving the beginning of Day 2, and then stressed the importance of using pattern details, reference materials and making patterns to make sure all the parts of the Loon were in the correct locations, especially the eyes, and parts of the beak details. And then the sandpaper came out. Since this was to be a detailed if you like Loon, all the surfaces were sanded before laying out the individual feathers within the feather groups. On day 3, the detailing began. Larry showed us the individual feather locations to draw in, and then carve to shape, and of course sand again. By the end of the day, he demonstrated his techniques to burn the individual feathers, which we will be doing over the winter if we like. We plan to seal and Gesso the pieces, and then Larry will do a seminar next summer at a CarveIn on painting. Once again a very good class provided to us by one of our Club members, Thank you Larry.
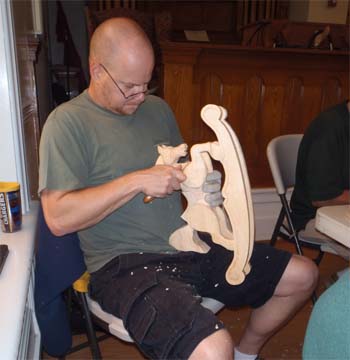 |
As in the past, our August Class was held at the Senior Center in Morrisville.
This year, nine members signed up to carve a scale rocking horse with our
president Matthew Strong. There was a choice of three sizes. The pile of
chips on the floor by each carver was in direct proportion to the size chosen.
The first day was focused on carving the horse body separate from the legs.
Beginning with the various parts of the head, and then the challenge of
carving the flowing mane. As always the Senior Center provided us with a
bottomless coffee pot and excellent noontime meals. By day two, it was time
to finish the major parts of the body and begin to work on the legs, especially
the parts difficult to work on after the three parts were put together but
always avoiding the thin section and tricky grain. Despite Matt's doweling
job Richard of course was the only one to break a leg in the process…
Matt spent a lot of time explaining the muscle structure as we carved and
worked on decorating the rockers. By the end of the day it was time to glue
the rockers to the body. Our final day on Friday focused on blending the
legs into the body and adding all the details. We must have been getting
tired by day three as we kept hearing a tool drop off the table and Matt
reminding us, "don't try to catch it". By the end of the day,
most of the horses were in good shape, requiring only a bit more work at
home. Hopefully we'll see the final products at the next CarveIns. Once
again a very good class provided to us by one of our Club members, Thank
you Matthew.
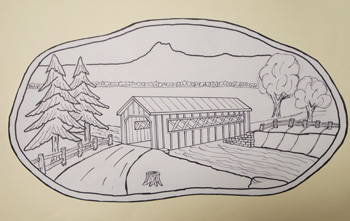 |
The subject for our 2014 3 day class will be a covered bridge carved in relief. While the pattern may look a bit difficult for your first attempt at relief carving, the focus of the class will be to introduce carvers how to work in relief. Novice carvers may decide to not include as many details, while more experienced carvers have an opportunity to add more details. The blank for the carving will be your choice of basswood or butternut, and the shape can be the freeform as shown or a simple oval shape. If carved in basswood, you will have the option to paint your carving. As in the past we are planning on offering the 3 day class on August in Morrisville VT. The cost of the three day class will be $125 which will include 3 days of instruction, the roughout pattern, coffee, snacks and lunch on each of the days. Due to increased lunch costs, last year we have had to raise the cost slightly to meet our expenses, but its still a great deal when you consider that everything is included in the class cost. If you are considering taking the class please let us know as soon as possible so we can move forward with planning. We will have examples of the class projects at the next few carve-ins, and you can also register at the next few
|
We labeled our August 1013 class "Fish & Chips". Participants worked on carving two subjects, a Stylized rainbow trout in either pine or butternut with Bob Lindemann and a chance to try your hand at chip carving a blue heron pattern with Dave Tuttle. 8 members participated in the class, by thursday afternoon most all of the trouts were ready for paint, so while the paint dried, Dave lead the group on an introduction to Chip Carving. We kept looking over our shoulders on friday as the fish were finished and we realized we were over out daily limit, and hoped the Game Warden didn't show up...
|
This year's August class was carving Santa (or an Elf) riding on a Moose
lead by our own member Dave Tuttle. Seven members signed up for the carving
class. Dave began with a discussion of the basic process of removing material
from the blank to release the various parts of the figure as well as the
moose and the horns. As the horns were carved separately from the Moose,
some started with the horns while others tackled the body blank, and returned
to the horns as a break. The horns proved quite tricky as the grain and
thinness of the antlers often resulted in hearing, "oops, I need some
super glue…", and sometimes, "does anyone have a bandaid?"
By the conclusion of the first day, we had the piece starting to resemble
the model.
On day two, we started thinning the various parts of the carving often jumping
from the Moose to the figure and back again as all the parts needed to blend
together. As most got to a certain point, Dave would explain the next step,
like how to carve the various parts of the face step by step.
Our final day was detail day, as the basic carving was there, we had to
add details like how the coat flows around the body, set in the blanket,
add muscle groups and hoofs to the Moose, carve the gloves and finally adding
hair to the Moose. Dave explained the basic painting scheme which we could
finish at home. By the end, everyone had a semi-finished or finished carving
ready for paint. Some had a few red stains on their carving, but so it goes
with any carving class.
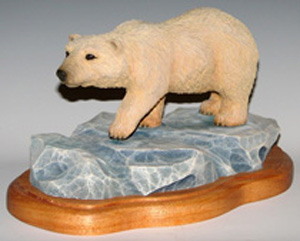 |
This year's August class was carving a realistic Polar Bear with Wayne
Smith. While we had hoped for 10 participants, in the end only six members
signed up for the carving class. That of course meant more time for the
instructor to spend with each of the participants. As a result, by the third
day all of the Polar Bears were completed, and most painted, which does
not often happen on a project so detailed as this one. Once again, the class
was held at the Senior Center in Morrisville with very good meals and snacks
as well as the "bottomless pot of coffee" provided by Meals on
Wheels.
The class began with a discussion and looking over photos of Polar Bears
to see what features define the shape for the bones and muscles. These features
were drawn on the blank and then the groups were carved in. A lot of material
had to be removed as the bear had one foot elevated. By the conclusion of
the first day, we were beginning to define the features of the bear's face,
as we worked step by step to establish the nose, eyes, mouth and ears so
the face looked as realistic as possible.
On day two, we completed the face details and then moved on to long process
of texturing the hair detail. Using a small gouge we began to add shape
to the hair, and making it flow in the correct direction. This was compounded
by the shape of several parts, which were difficult to get the tool into.
Just when we thought things were looking good, Wayne demonstrated how to
use the burner to add yet more detail over the carved texture to add more
realism. Again, a very long process, but in the end was well worth the extra
effort.
Our final day, while some still worked on texturing, Wayne demonstrated
how to use a series of washes and dry brush technique to paint the bear.
Along with the demonstration, he handed out detailed instructions with suggested
colors, brushes and techniques for painting. Everyone left with a very fine
looking bear, and a lot of new knowledge on completing realistic animal
carvings. If any members ever get an opportunity to take another carving
class with Wayne, he comes highly recommended by everyone taking this year's
class.
2010 Class Report - 3 Birds in 3 Days
 |
 |
 |
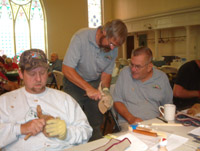 |
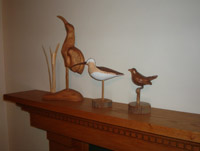
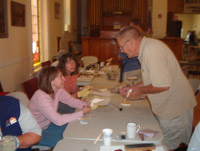
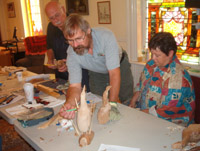
| Once again we utilized the Morrisville Senior Center for our August
class, but we tried a new format, 3 instructors leading the group carving
3 birds in 3 days. In addition to many that take the class each August we
had a number of new carvers, one coming as far away as Philadelphia to join
us. Tuesday began with Larry Bertrand handing out basswood blanks to begin
carving a House Wren. After blocking in the basic form, he explained how
to lay out the feather groups, and also a new method of setting eyes without
using epoxy. By the end of the first day most were taking shape, but needed
a bit of "homework". Wednesday the Senior Center had a morning event planned so we had live music, as Matt Strong handed out the blanks for a stylized American Bitter in Butternut. We began with carving "grass" for the base. Carved very thin, the pine pieces were placed in water to soften till lunch so they could be bent into shape. The body blank required a lot of wood removal to get the basic form so by lunch the floor was covered with quite a large pile of wood chips. Matt carved his own piece so we could see how each part of the finished piece evolved. Again by the end of the day, the carvings were taking shape. Thursday, Dave Tuttle lead us through the process of carving a shore bird. The basswood was a bit easier to carve, the grain cooperated, and by lunch the birds were finished and ready for paint. After another excellent lunch provided by Meals on Wheels, Dave pulled out the paints and brushes and demonstrated which colors to mix and techniques to do the basic colors and add the feather details. By clean up time, most of the shore birds were completed by the end of our last day. Our homework assignment the last day was to bring all 3 birds to the show Saturday for the "Class" table. Some arrived as "works in progress", while some "burned the midnight oil", to get all 3 birds finished. Once again we had a very successful class, thanks to all of the advance planning, organizing and the talents of our three instructors. |
2009 Class Report:
| |
|
|
|
 | |||
| Dave Tuttle was our instructor for our 2009 Carving Class. In the
past, we have used the basement of the American Legion Hall, but this year,
Wood arranged for us to use the Morrisville Senior Center, a much larger
space, with air conditioning and large stain glass windows for light. Our
subject for this year was a character carving of a cowboy gun fighter. 9
members attended the three day class. The award for the person traveling
the greatest distance goes to Graeme Rhind who traveled half way around
the world from Australia just to attend our August Class and Show. After handing out the cutouts, we quickly got to work removing excess material and blocking in the basic features. By the end of the first day we had made enough progress that Dave handed out practice blocks so we could learn to work on the procedure for carving faces. By day two, we had made so much progress we set aside the cowboy and carved a Christmas Gnome, practicing carving faces again. After lunch we went back to carve the cowboy face and hat, and adding more details to the figure. By the third day out came the paints. Dave demonstrated his painting technique on the gnome first and then as we finished the cowboy, we started painting the cowboy. By the end of class most had finished both carvings. The Senior Center provided an excellent location for the class. As we were sharing the space, other activities were also going on at the Center. One day there were local musicians, and another a dance class, which Ingrid quickly joined in to learn a few more steps. Once again we had a great August, thanks to Dave offering to share his experience with the Club. Next year? If you have ideas give Wood a call. |